First Shots & Declaration of Independence Hands-on Lesson Plan for Kids
This is the 8th lesson in a series of 27 hands-on lessons covering American History through 1865. This lesson focuses on Lexington & Concord and the Declaration of Independence. I used this plan while teaching a 45 minute history class for children in Kindergarten, 1st, & 2nd grades. Each lesson includes a biography report, history notebook page, history song, our favorite children’s books, a joke, & a variety of hands-on activities (cooking, painting, dramatizations, etc.) to make each lesson engaging & memorable. Use these fun lessons with your classroom, homeschool, after-school program, or co-op!
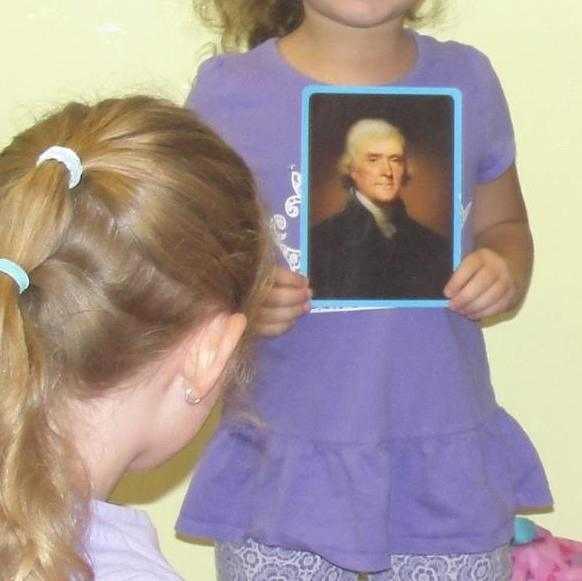
Student Biography Presentation: Thomas Jefferson
1. Student biography report on Thomas Jefferson
Review, Ink, & Paul Revere’s Ride
2. Review: When you hear Jamestown, who should you remember? (Pocahontas & John Smith) Who did Squanto help in Plymouth, Massachusetts? (the Pilgrims) Which 2 countries were fighting during the French & Indian War (English/British & French) What was the name of the king of England during this time? (King George III) What is Patrick Henry famous for saying? (“Give me liberty or give me death.”) What job did Paul Revere have? (silversmith) What do we call the event that happened in Boston when British soldiers shot into a crowd of rowdy colonists & killed 3 colonists? (Boston Massacre) Name someone who was involved in the Boston Tea Party (Paul Revere, Samuel Adams, Sons of Liberty) Why did the Sons of Liberty dump tea into the Boston Harbor during the Boston Tea Party? (They didn’t want the colonists to buy the tea & pay the “unjust” taxes on the tea that King George III of England had allowed the British Parliament to enforce & collect.)
3. Open your notebooks to your 13 Colonies map. Together sing 13 Colonies Song (Tune: Yankee Doodle) while pointing to each colony on your map.
New Hampshire, Massachusetts, Rhode Island and Connecticut
New York, New Jersey, Pennsylvania, little Delaware…
Maryland, Virginia, North Carolina
South Carolina, Georgia, thirteen colonies!
4. Begin making ink.
- During the colonial period they sometimes made their ink using the shells of nuts.
- Have children each smash at least 1 shelled nut by putting it in a kitchen towel and smacking it with a hammer.
- Have them place the shells in a saucepan and eat the nut if desired if it’s an edible nut. (It’s okay if some of the nuts get into the saucepan.)
- Pour in about 1 1/2 cups of water (or whatever amount barely covers the shells) and bring the shells to a boil. [Alternately, boil the water ahead of time and then pour the boiling water over the shells.]
- Reduce heat and let simmer 20-30 minutes.
- Pour the ink through a strainer to remove most of the shell pieces.
You will need:
- at least 1 shelled nut (pecan, walnut, hazelnut, hickory nut, acorn, etc.) per child (I use pecans because pecan trees are grown locally here.)
- a kitchen towel or washcloth per child
- a hammer per child
- a small saucepan
- a sieve or strainer
- a bowl or other container with which to hold the ink
5. Read Paul Revere’s Ride by Shana Corey.
You will need:
- Paul Revere’s Ride by Shana Corey or other book about Paul Revere’s midnight ride
Option 1: Paul Revere’s Tin Can Lanterns
(NOTE: When I teach a smaller group (8 or less) or have lots of adult helpers, I use this activity. When I teach a larger group, I replace this activity with the art study below.)
6. Go outside to make tin can lanterns like the ones Paul Revere used to hang in the church tower.
- Tip: Many of the younger children will probably need assistance with holding the can & hammering. Try to get helpers (older children, aides, parents, etc.) to assist in holding the cans and/or nails while the children hammer away.
- Give each child a nail, a hammer, 1-2 small towels, & a metal can that has been filled with water & frozen.
- Use 1 towel to go under the can to keep it in place. If needed let children have a second kitchen towel to hold the cold can.
- Allow children to use a nail and a hammer to hammer 2 holes on opposite sides toward the top of the can so that a handle can be added.
- Allow children to use a nail and a hammer to hammer holes in the can all over. They can try to make a pattern if they’d like, though random holes are perfectly fine.
- Tell children to not reach their hands inside their lanterns as the metal is sharp & can cut them.
- After the children have finished hammering their holes, go to a sink to release & dump out any frozen water pieces. Place a tea candle inside the can.
- Pass out a pipe cleaner to each child to loop through 2 holes toward the top of the can to make a handle.
- An adult can drop a tea candle into each lantern.
- Go into a room that can get dark (such as a bathroom). Use a Bic grill lighter to light the candles. Turn out the lights to watch the lanterns glow.
- Have the children repeat, “The Red Coats are coming by sea!”
You will need per child:
- 1 metal can (like a soup can or canned fruit can) – At least 1 day before this lesson, fill the cans with water & freeze them. The ice prevents the cans from collapsing when the children hammer holes in them.
- 1 3-inch nail
- 1 hammer (I asked parents to send one with their child to class & also brought extras from home & from the Dollar Tree)
- 1 pipe cleaner
- 1-2 kitchen towels or washcloths
- 1 tea candle
You will need also need:
- 1 Bic grill lighter
Option 2: Art Study of Paul Revere’s Midnight Ride
6. Show The Midnight Ride of Paul Revere by Grant Wood & quickly ask these questions based on the ones from the Picturing America Teacher’s Manual:
- What’s the first thing you see in the painting? What else do you see in the painting?
- Where does Paul Revere appear to be going and where has he been?
- In the last lesson we looked at a painting of Paul Revere by John Singleton Copley. How is this one different?
- How did the artist, Grant Wood, show that Revere was on an urgent mission?
- What is the light source? (house lights & moon)
You will need:
- a picture of The Midnight Ride of Paul Revere by Grant Wood
Battles of Lexington & Concord
7. Quickly summarize the Battles of Lexington & Concord while flipping through the pictures in the book Summarize Let It Begin Here! by by Dennis Brindell Fradin. I passed out a map for the children to use to follow the route with their fingers.
This is generally what I said as I flipped through the illustrations in the book:
Apr. 18, 1775: 10pm – Paul Revere sets out
Apr. 19, 1775:
- 12am – Revere reaches Lexington & warns Hancock & Adams: Revere: “Noise! You’ll have noise enough before long! The regulars are coming out!”
- 1am: Revere gets caught by British but Dr. Samuel Prescott has his horse jump over a stone wall & makes it to Concord
- 5am: Lexington farmers, fathers & sons, & grandfathers gather on Lexington Green
– Captain John Parker: “Don’t fire unless fired upon. But if they mean to have a war, let it begin here!”
British Major John Pitcairn, who boasted Americans would run away: “Disperse, ye rebels, disperse in the name of the king! Lay down your arms!” (He died 2 months later at Battle of Bunker Hill.)
Most men turn to go home. A shot rings out. We don’t know from which side. Recoats start shooting for 10 minutes, killing 8 men & wounding 10. Jonathan Harrington, walking home, was shot near his doorstep & died as he crawled to the feet of his wife and son.
- 7am: British marched 5 miles to Concord, seizing weapons & gunpowder & burning down the town.
- 10am: “Will you let them burn the town down?” Colonel Barrett orders troops to North Bridge & they kill 15 redcoats. * After hearing of the shooting in Lexington, about 3,600 patriots from 40 towns join in the fight, many hiding behind brick walls. * In Menotomy 78-year old Samuel Whittemore shoots 3 redcoats. The British shoot him in the head & then stab him 13 times with bayonets. Amazingly, he survives & lives to age 96.
- 7pm: British arrive back in Boston, with 300 redcoats dead or wounded & 100 colonists dead.
***NOTE: They are still British citizens. They are still loyal to King George III of England. The Second Continental Congress met A YEAR LATER to declare their independence from England. These events at Lexington & Concord were some of the many grievances the delegates included as evidence of why they needed to separate from England.
You will need:
- Let It Begin Here! by Dennis Brindell Fradin or other book on the Battles of Lexington & Concord and a map for each student of Paul Revere’s route (optional)
Declaration of Independence & Review
8. Quickly explain about the Declaration of Independence.
- After the Battles of Lexington & Concord, many colonists decided they should separate from England and become their own country. Representatives from each of the colonies met together & eventually decided to have Thomas Jefferson write a letter to King George III of England saying that America was going to become her own country. Thomas Jefferson’s letter also included lots of things they thought King George III had done wrong. We call this letter the Declaration of Independence.
- Show a replica of the Declaration of Independence & point out John Hancock’s signature. He was the first man to sign it and signed it large “so King George III [could] read it without his spectacles.”
You will need:
- a replica or large picture of the Declaration of Independence
9. Finish making ink: Let the children watch while you strain the ink by pouring the liquid and shells into a mesh colander that is sitting over a bowl. If you wanted to keep this ink for a while, you would add vinegar to keep the ink from fading and salt to keep the ink from growing mold. We’re not going to do that, though, because we’re going to use the ink right now.
You will need:
- a sieve or strainer
- a bowl or other container with which to hold the ink
10. Tell the children that the colonial people didn’t have pens like we have. Instead they used quill pens, made from feathers. Demonstrate how to dip the tip of the feather into the ink we just made and then write with it. Have everyone sign their name on the bottom of their own Declaration of Independence copy using a quill pen and the homemade ink. Tell children to put this in their binder after it dries.
You will need per child:
- a feather (Make sure to use feathers with good tips. Craft feathers are fine. Optional: You can cut off part of the tip to make an angle that will hold ink better, but it’s not necessary. I didn’t.)
- a printed copy of the Declaration of Independence such as this one from wikipedia punched with a 3 hole punch
11. Review: Who is famous for warning the colonists that the redcoats were coming? (Paul Revere) What did they use as a sign in the church to say if the British soldiers would be marching on the land or sailing in boats? (lanterns) What was one of the first battles fought? (Battle of Lexington) What do with call the colonists who had to be ready to fight at a moment’s notice? (Minutemen) What is the famous “letter”/document that Thomas Jefferson wrote? (Declaration of Independence) What did it say? (That America would no longer be ruled by England) What was some ink made from during the Colonial period? (nut shells) What did they use to write with since they didn’t have pens? (feathers called quill pens)
12. Assign next week’s biography report on Benedict Arnold.
We read through many children’s picture books, and these were our favorites (not including the books used in the lesson):
- The Midnight Ride of Paul Revere by Henry Wadsworth Longfellow, illustrated by Christopher Bing
- Paul Revere’s Ride (Graphic History) by Xavier W. Niz
- Those Rebels, John & Tom by Barbara Kerley
- Will You Sign Here, John Hancock? by Jean Fritz
- Caesar Rodney’s Ride: The Story of an American Patriot by Jan Cheripko
- Declaration Of Independence by Sam Fink
- When Mr. Jefferson Came to Philadelphia: What I Learned of Freedom, 1776 by Ann Turner
Optional Homework: Memorize this song about the Declaration of Independence
Liberty Kids: Declaration of Independence
AMERICAN HISTORY FOR EARLY ELEMENTARY:
Native Americans & Columbus Lesson
Jamestown Lesson
Pilgrims Lesson
Thirteen Colonies Lesson
French and Indian War Lesson
Colonial Period & Revolution Rumblings Lesson
Boston Massacre & Boston Tea Party Lesson
First Shots & Declaration of Independence Lesson
American War for Independence Battles Lesson
Valley Forge & Battle of Yorktown Lesson
American Literature Lesson & American War for Independence Review
Colonial Christmas Party
Constitution Lesson
Three Branches of Government Lesson
President George Washington Lesson
Louisiana Purchase Lesson
War of 1812 Lesson
Monroe Doctrine Lesson
Trail of Tears Lesson
Oregon Trail & Battle of Alamo Lesson
California Gold Rush & Pony Express Lesson
American Industrial Revolution Lesson
Underground Railroad Lesson
Abolitionists & Women Suffragists Lesson
Civil War: The Confederate States & Abraham Lincoln Lesson
Civil War Battles Lesson
Civil War Party & End of Year Review Game
BONUS LESSONS (if you have room for a few extra classes):
Reconstruction Lesson
Wild West Lesson
Immigrants Lesson
Tycoons & Theodore Roosevelt Lesson
World War I Lesson
Roaring Twenties Lesson
Great Depression and the 1930s Lesson
World War II Lesson
ALL MY LESSONS:
Fun, Free Hands-on Unit Studies (My Lessons in All Subjects)
© 2018 Shannon
Recent Comments